Just a few short days away from Halloween, and ya, I’m ready. You know why?? Because that means Thanksgiving is next and it is like a baking extravaganza in my family.
This is what the tradition has become:
I go visit my mom in Tucson, Az. (because get me out of the cold please and thank you) and we spend an entire day baking our guts out (after several weeks of grocery lists and diligent planning). Key lime pie (because it’s my Uncle’s fav), Pecan Pie (because my cousin Katie loves it), Cherry Pie (my Aunt is a big fan), Classic Pumpkin Pie (because it Thanksgiving. Duh. And my mom’s go to), and then something banana (because I’m all over that sh!t). So, we bake, and bake all day the day before Thanksgiving. And then we take all those bakes up the road to my Aunt’s house where she, my Uncle, and some of my cousins have been slaving over the oven and stove preparing all the wonderfully delicious SAVORY items. Then we feast. Then we sleep. And it’s fantastic.
This year we’re going to go beyond just pies, and incorporate some thanksgiving inspired crème brulee, various fall flavored cookies, and of course: that classic pumpkin pie.
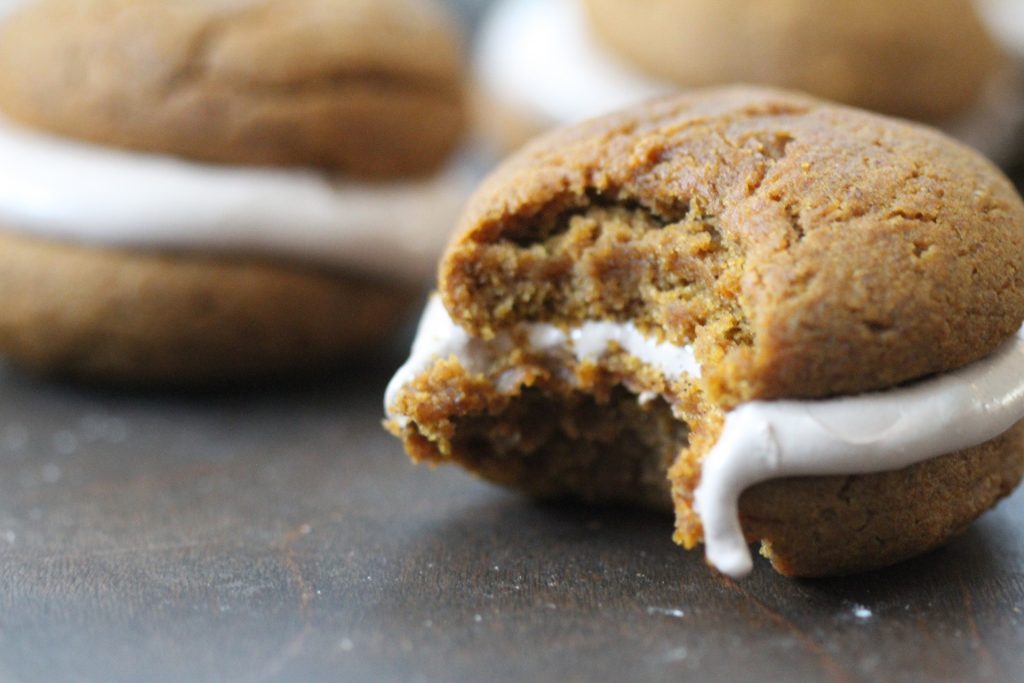
I’ve given myself the job to bring to you all the wonderfully different ways you can incorporate pumpkin into your life this fall. Today is no exception, and this will not be the last recipe. Moon pies are a wonderfully nostalgic sweet treat for me. You may be wondering what the hell a moon pie is? Well, it’s like a cake-ish cookie that’s sandwich-ing a layer of marshmallow. In today’s recipe, cocoa marshmallow. Because why not? I think pumpkin and cocoa go together so well! But feel free to omit the cocoa powder if you’d like! A vanilla marshmallow would be equally as delicious.

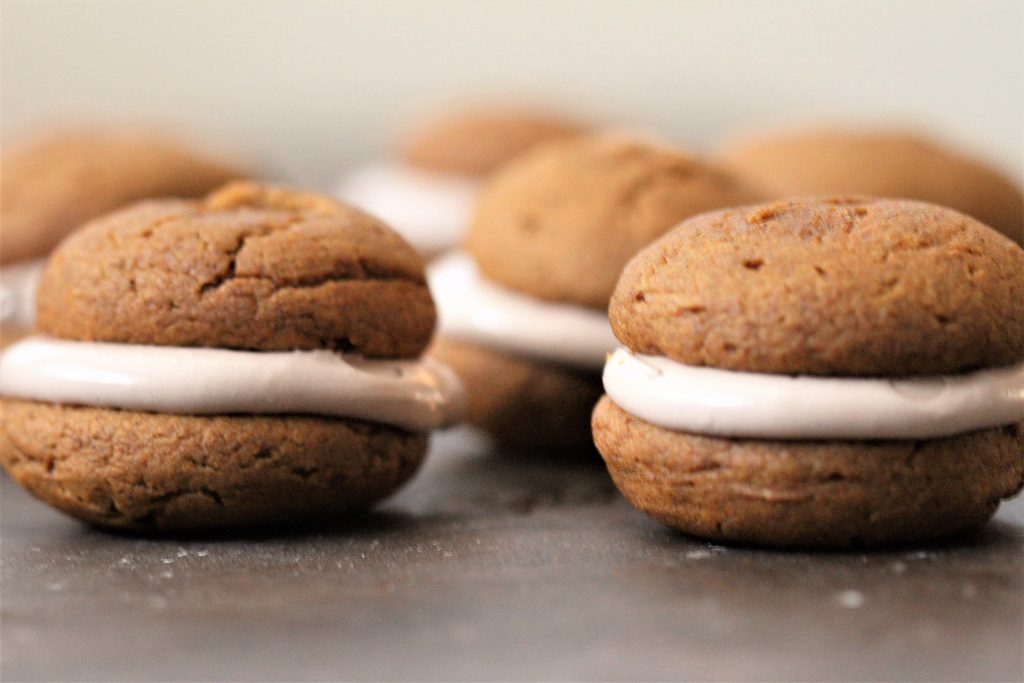
Pumpkin Moon Pies with a Cocoa Marshmallow Filling
Makes 10-12 moon pies
Oil ½ cup
Brown Sugar 1 cups
Eggs 1
Pumpkin puree 1 ½ cups
Vanilla 1 tsp
Flour 1 ½ cups
Salt ½ tsp
Baking powder ½ tsp
Baking soda ½ tsp
Cinnamon 1 T
Ginger 1 ½ tsp
Nutmeg ½ tsp
Cloves ½ tsp
Cocoa Marshmallow Filling
Gelatin ¼ oz. package (2 ¼ tsp) (bloom in 1/4 cup cold water)
Sugar 1 cup
Water ½ cup
Light corn syrup ¼ cup
Vanilla bean ½ pod
Cocoa powder 1 T
Directions:
Preheat oven to 350 degrees F (175 degrees C)
Mix together oil and brown sugar in a standing mixer fitted with a paddle attachment. Add egg.
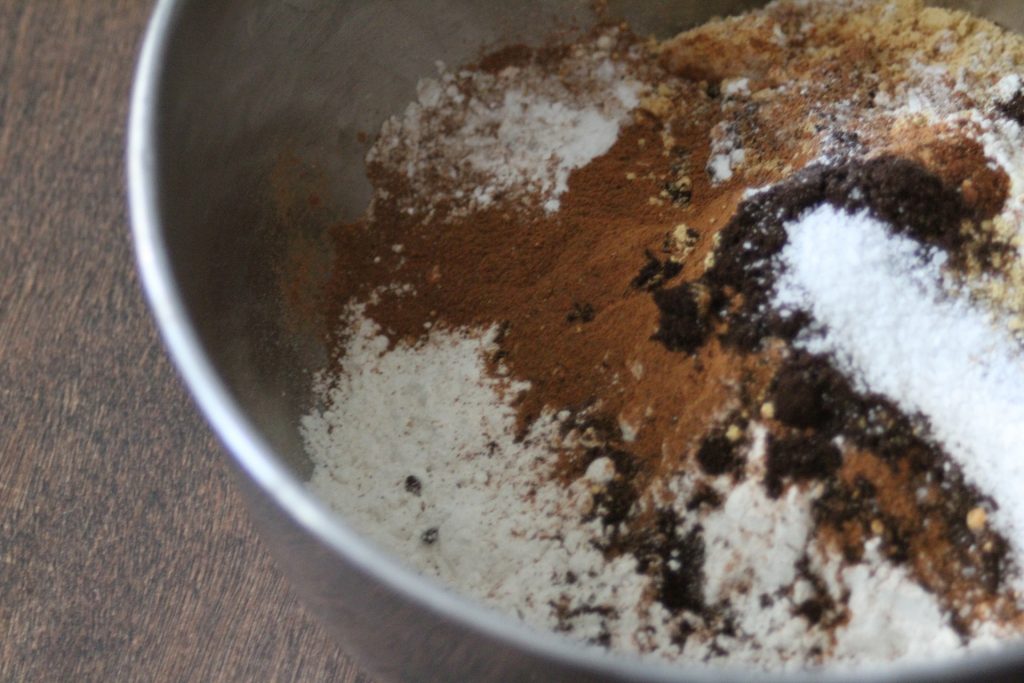
In a separate bowl, combine flour, salt, spices, and leavening. Whisk together.
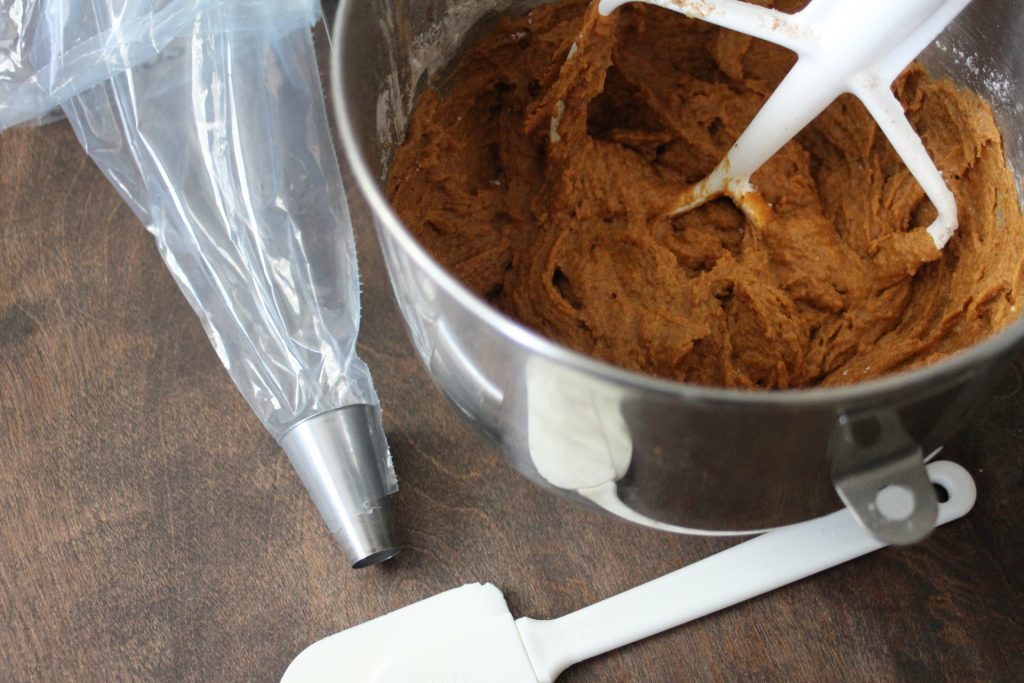
To the mixing bowl, add half the flour mixture, scrape down the sides, then add the pumpkin puree.
Scrape down sides, and add the remaining flour mixture.
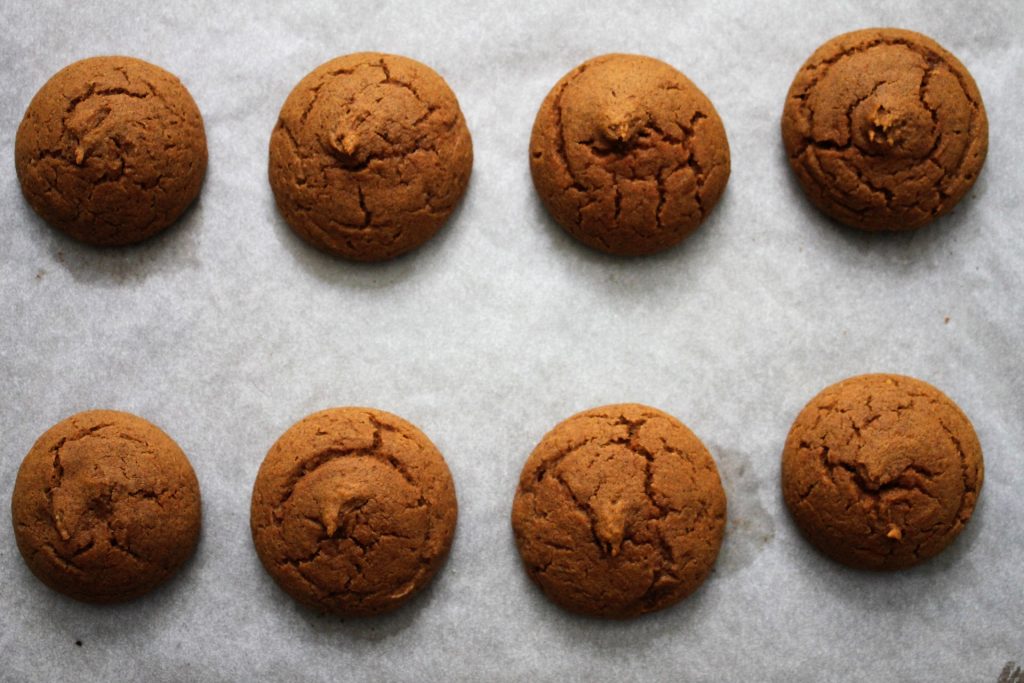
Fit two cookie sheets with either parchment paper or a silicone mat.
Fit a pastry bag with a large flat tip and fill the bag up with the pumpkin batter.
Pipe 2” disks onto your parchment and space about 1”(2.5 cm) apart from each other.
These don’t spread too much, but they’ll puff up a bit.
Bake for 10-12 minutes.
To make the marshmallow, start by blooming your gelatin in the bottom of your mixing bowl or stand mixer. First put ¼ cold water in the bowl, then sprinkle over the powdered gelatin. Fit your mixing bowl with a whisk attachment.
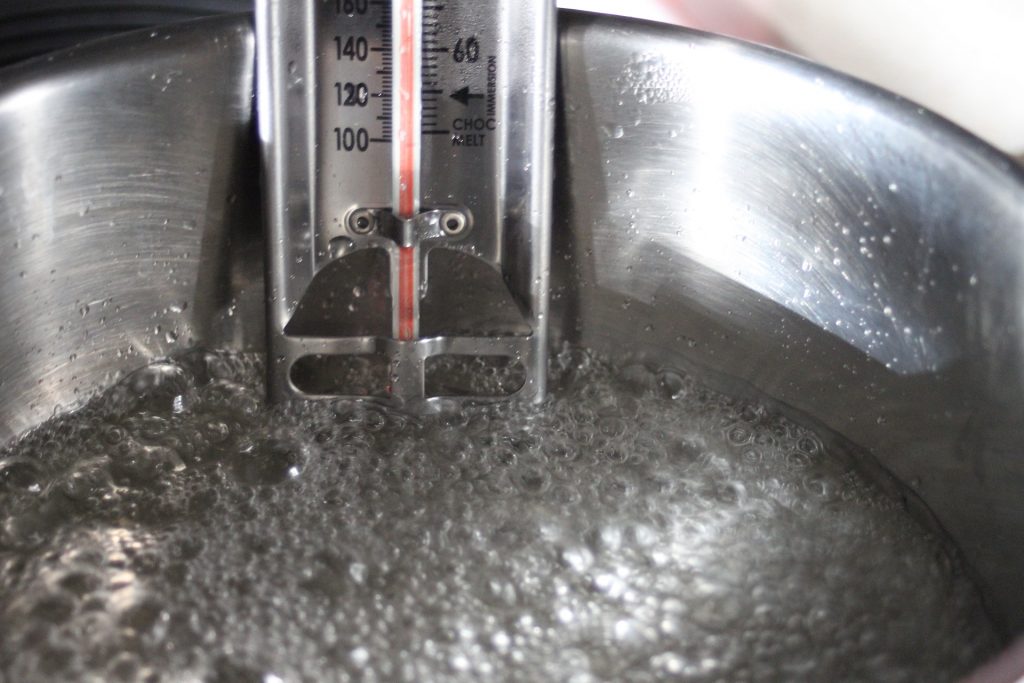
In a sauce pan, place the water, sugar, and fit a candy thermometer to the side. Heat on high and watch closely. You’re looking to reach 240 degrees F (115 C).
Scrape the vanilla beans out of the pod and measure out your cocoa powder in a small bowl. Set aside. You’ll be adding this at the end.
Once your sugar mixture reaches temp, pull from heat, and start slowly pouring into the mixing bowl. Have the mixing bowl speed on low until you’ve poured all the sugar mixture inside.
Once sugar mixture is poured in, turn speed on mixer to high and let it start whipping.
You’re looking to get the mixture to double in size. This should take 5 to 10 minutes.
Once doubled in size, add the vanilla seeds and cocoa powder. Whisk on high again for 1 minute.
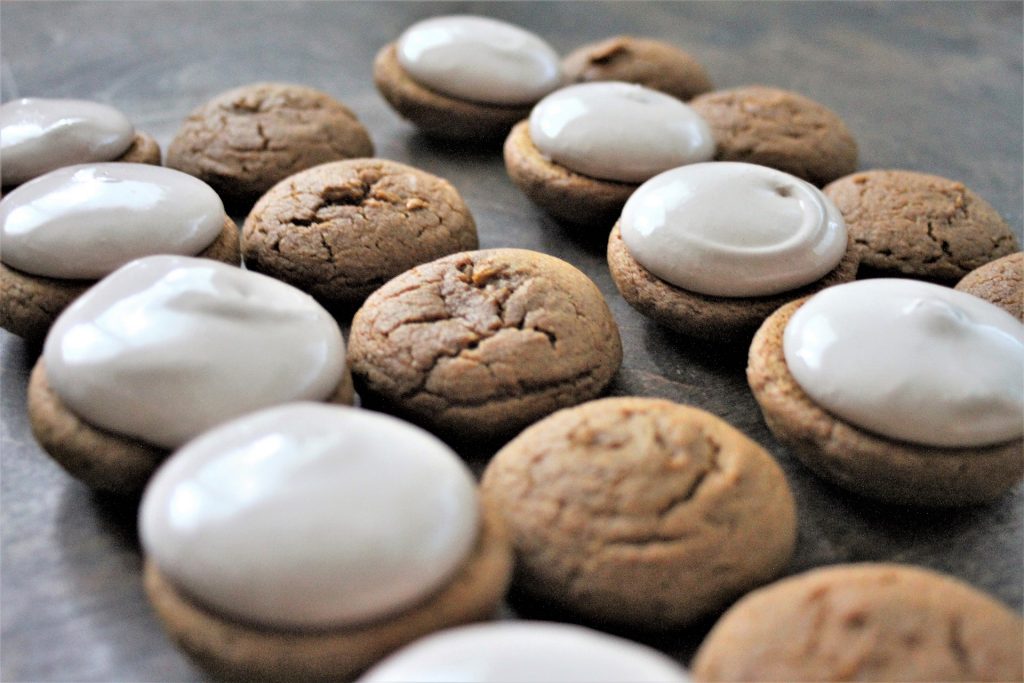
Line your cookies next to one another. One face up one face down so you can easily pipe filling and close the cookie.
Quickly place your marshmallow into a piping bag. Be warned: This is a really sticky part! But it’s worth it.
Pipe as best you can and as fast as you can onto each cookie, and top. You probably will have extra marshmallow left to do with whatever you please!
Now ENJOY!
These cookies will last for a week in an airtight container.

Pumpkin Moon Pie with Cocoa Marshmallow Filling
Ingredients
Pumpkin Moon Pies
- 1/2 cup canola oil
- 1 cup brown sugar
- 1 egg
- 1 1/2 cups pumpkin puree
- 1 tsp vanilla
- 1 1/2 cup flour
- 1/2 tsp salt
- 1/2 tsp baking powder
- 1/2 tsp baking soda
- 1 Tbsp cinnamon
- 1 1/2 tsp ginger
- 1/2 tsp nutmeg
- 1/2 tsp cloves
Cocoa Marshmallow Filling
- 2 1/4 tsp gelatin powder (bloomed in 1/4 cup cold water)
- 1 cup sugar
- 1/2 cup water
- 1/4 cup corn syrup
- 1/2 vanilla bean pod
- 1 Tbsp cocoa powder
Instructions
- Preheat oven to 350 degrees F (175 degrees C)
- Mix together oil and brown sugar in a standing mixer fitted with a paddle attachment. Add egg.
- In a separate bowl, combine flour, salt, spices, and leavening. Whisk together.
- To the mixing bowl, add half the flour mixture, scrape down the sides, then add the pumpkin puree.
- Scrape down sides, and add the remaining flour mixture.
- Fit two cookie sheets with either parchment paper or a silicone mat.
- Fit a pastry bag with a large flat tip and fill the bag up with the pumpkin batter.
- Pipe 2” disks onto your parchment and space about 1”(2.5 cm) apart from each other.
- These don’t spread too much, but they’ll puff up a bit.
- Bake for 10-12 minutes.
- To make the marshmallow, start by blooming your gelatin in the bottom of your mixing bowl or stand mixer. First put ¼ cold water in the bowl, then sprinkle over the powdered gelatin. Fit your mixing bowl with a whisk attachment.
- In a sauce pan, place the water, sugar, and fit a candy thermometer to the side. Heat on high and watch closely. You’re looking to reach 240 degrees F (115 C).
Scrape the vanilla beans out of the pod and measure out your cocoa powder in a small bowl. Set aside. You’ll be adding this at the end. - Once your sugar mixture reaches temp, pull from heat, and start slowly pouring into the mixing bowl. Have the mixing bowl speed on low until you’ve poured all the sugar mixture inside.
- Once sugar mixture is poured in, turn speed on mixer to high and let it start whipping.
- You’re looking to get the mixture to double in size. This should take 5 to 10 minutes.
- Once doubled in size, add the vanilla seeds and cocoa powder. Whisk on high again for 1 minute.
- Line your cookies next to one another. One face up one face down so you can easily pipe filling and close the cookie.
- Quickly place your marshmallow into a piping bag. Be warned: This is a really sticky part! But it’s worth it.
- Pipe as best you can and as fast as you can onto each cookie, and top. You probably will have extra marshmallow left to do with whatever you please!
- Now ENJOY!